Microsoft Paint is not much powerful as lots of professional photo editing tools. But, still is it can be very handy and useful if you learn its techy techniques. Many basic photo editing operations such as snipping, cutting, and conversion can be performed using MS Paint.
ℹ️Read this for the Paint 3d app ???????? How To Fade An Image In Paint 3d?
Creating a faint version of an image is easy with the Microsoft Paint application. The final output will not be that professional, but it will do the basic job.
The logic used to make a fade image in MS paint is very straight. We are just going to put a square object over an image with marker fill. The marker color feature in Microsoft Paint is used to simulate a highlighter marker. You know that the marker intends to highlight text or object without losing transparency.
Similarly, placing a square with marker fill over the image will keep at least 50% transparency, and the image will look faded.
Follow this steps to fade picture using Paint
Open Image in Paint
Open your picture in MS Paint using Right Click->Edit
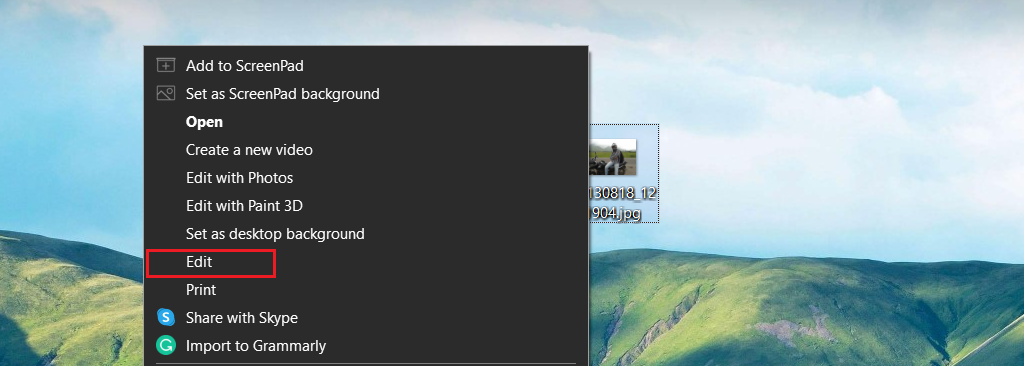
Place Rectangle
Select Rectangle from shapes, and place exactly over image size. Match all corners.
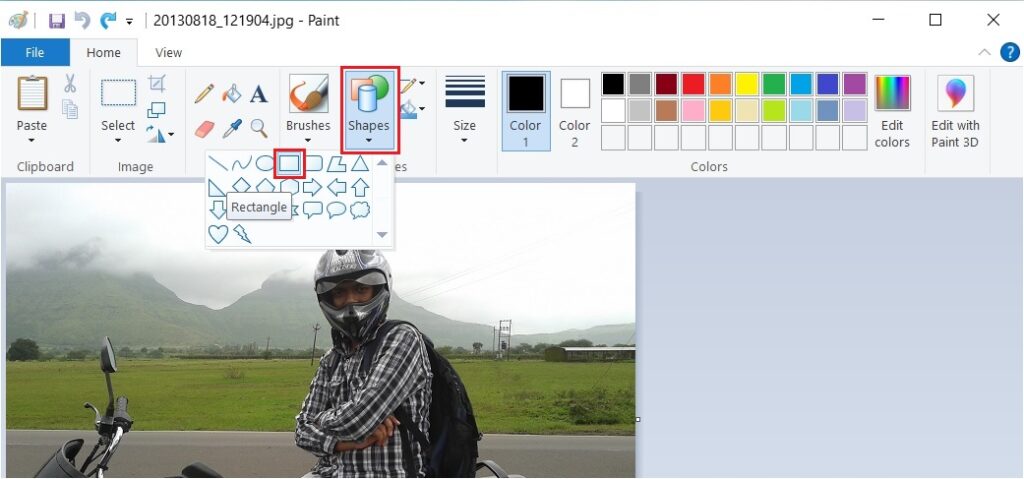
Set No Outline
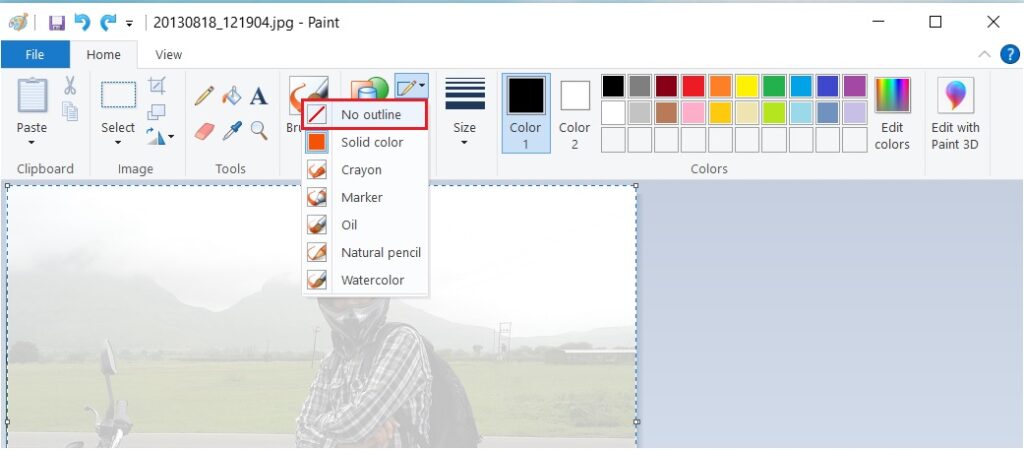
Set outlike setting to “No Outline”. It will remove outline border box from the rectangle shape so it will fully match to the corners of the edited image.
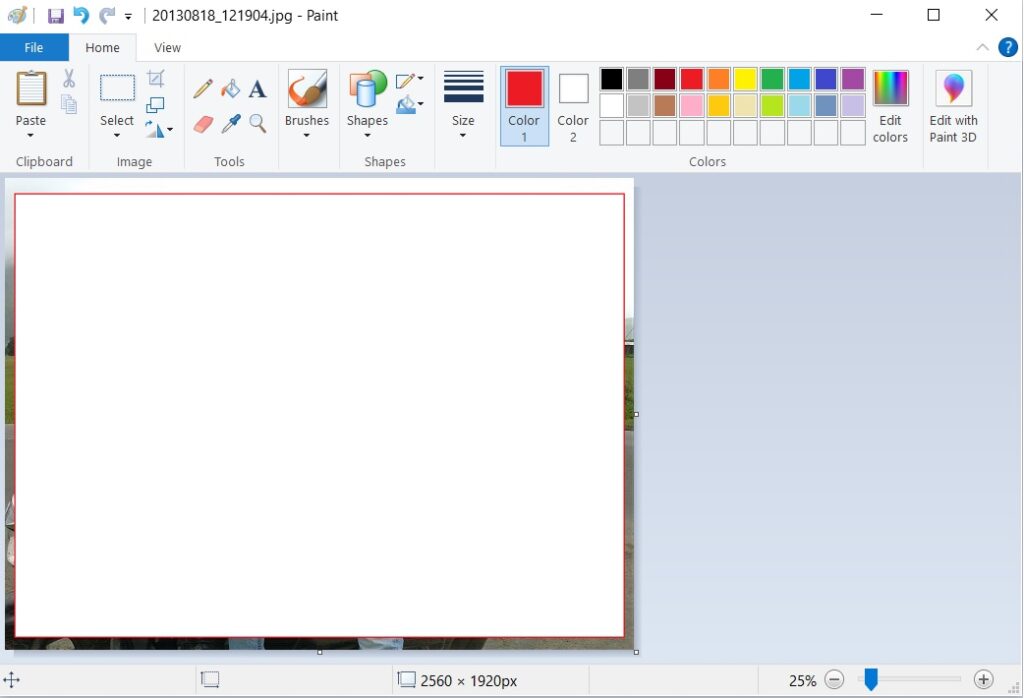
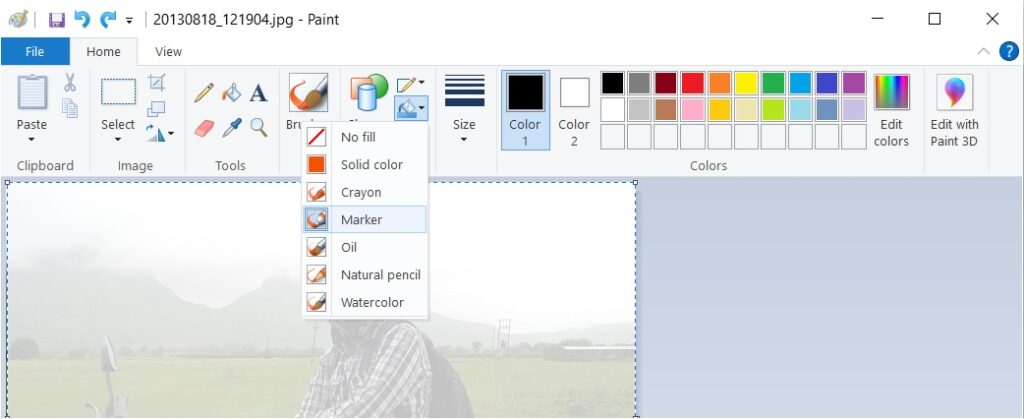
Set Marker Fill
Select Fill setting to “Marker”. It will turn placed rectangle fill colour to Marker. This marker effect has transparency and due to this image behind that rectangle will become visible with at least 50% opticity.
Save Picture
Save picture as .png or .jpeg format. ( .png is recommended for such images)
Note that you can also use other shapes also such as circal or oval. You can drag and move over those shapes to fade a part of image. In this way you can easily fade any picture using paint without using any professional photo editing tool.

